Session 4 – Browsers, Skype, iMovie

A web browser is a software application for retrieving, presenting, and traversing information resources on the World Wide Web.

I am going to show you 3 different browser:

  • Firefox
  • Safari
  • Chrome

I am going to use Firefox to show you some general features of a web browser:


Here is the Menu for Firefox, showing your choices for viewing:
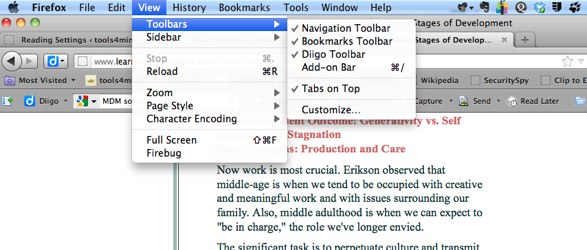
Firefox  View 1

We will take some time to explore the Navigation Toolbar and the Bookmarks Toolbar. In order to see what these toolbars provide, check and uncheck them to see what happens.

Here is the Bookmark Toolbar

Bookmark Toolbar 1

This is what you will see when you select “Show All Bookmarks”.  In this mode you can organize and understand how bookmarks are changed. We will explore this in depth
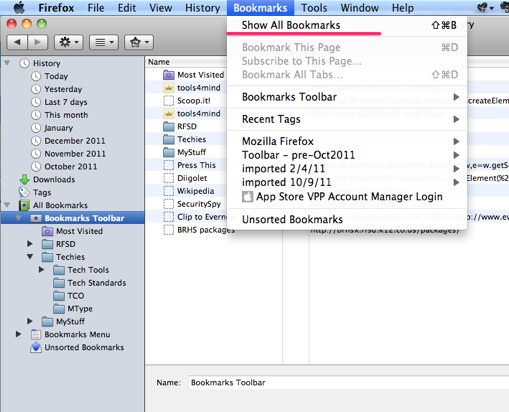
ShowAllBookmarks

Here is the Navigation Toolbar

Navigation Toolbar

You can customize this toolbar by going to Toolbars -> Customize
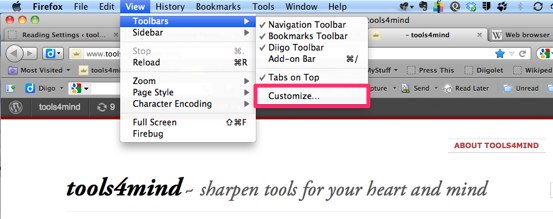
Skitched 20120219 223637

We will play with all of these options:
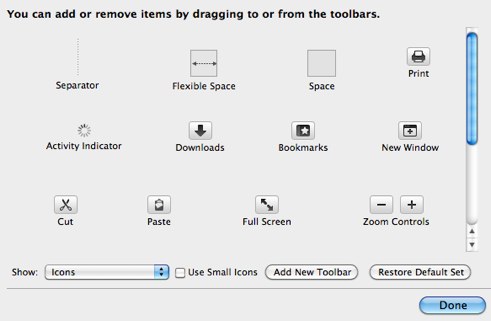
BrowserTools selection


iPhoto – organize pictures

Last night we spend some time organizing files (using the Finder) and photos (using iPhoto). In both cases I emphasized the importance of knowing what you want to move and where you want to put it. Knowing this you can open the proper windows with the files (that you want to move) and the folder (that is the target for the move).

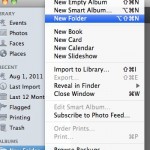
This morning I found this video describing how to organize photos in iPhoto. I think it illustrates what we did. Notice that the author goes one step further by creating a folder and moving his albums into folders.

iPhoto - New Folder

This could be helpful once you create many albums and want to organize them into manageable categories. – Happy Viewing

Session 2 – Dock and System Preference

Tonight we’re going to explore the “Dock” and “System Preferences“. For future reference, you will find links to the Mac 101 site where you can get a brief overview of these features.

But first we will do a review of last week.

Exercise 1: On the Desktop.
* open a program.
* create a file.
* Click, hold, and drag a file from one side of the Desktop to another.
* create a folder.
* drag file into folder.
* move the folder into Documents.

Exercise 2: The Dock
* Move a program to the Dock
* Open a program and set it to “stay in the Dock”
* Remove a program from the Dock
* Change the preferences of your Dock (resize, magnify, reorient to left or right)

Preferences
Personal – These control the look and feel. Personalize what you see and what you can find.
* Dock
* Appearance
* Spotlight

Hardware – Hardware controls the devices that connect to your computer
* CDs – DVDs
* Displays
* Battery – Energy
* Keyboard
* Mouse
* Trackpad
* Printer
* Sound

Internet and wireless – Connecting your computer to other computers and wireless devices.
* Network – wired and wireless controls
* Bluetooth – a different wireless
* Sharing – allowing access to your computer

System – Control the main parts of your Operating System.
* Accounts
* Date and Time
* Parental Controls
* Software Update
* Speech
* Startup Disk
* Time Machine
* Universal Access

iPhoto – Import

We took a brief tour of iPhoto. Here we will repeat the steps we took.

  • locate photos in a folder on your Desktop
  • Import the photos into iPhoto.
  • Move them into an Album.
  • Run a Slide Show.

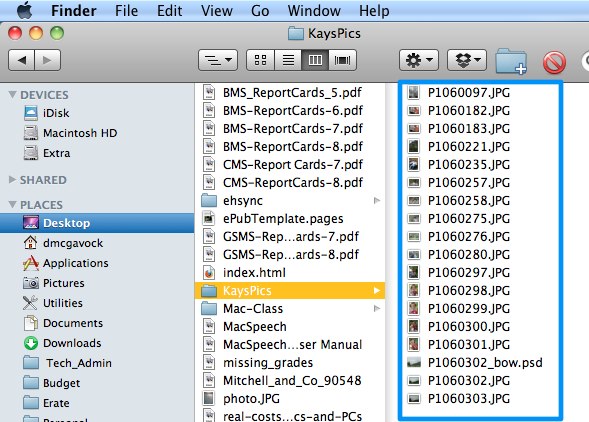
Open a Finder Window and locate the pictures that you want to import.

Pics in finder

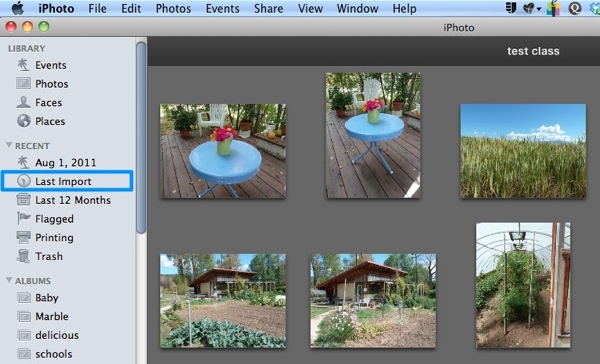
Open iPhoto. For reference click on “Last Import”. Here you see the last set of photos that you imported into iPhoto.

IPhoto Last Imort

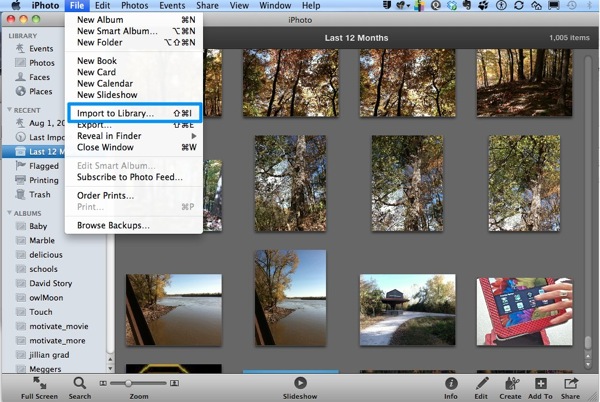
Now to import a new set, click File -> Import to Library…

Imort to iPhoto Library

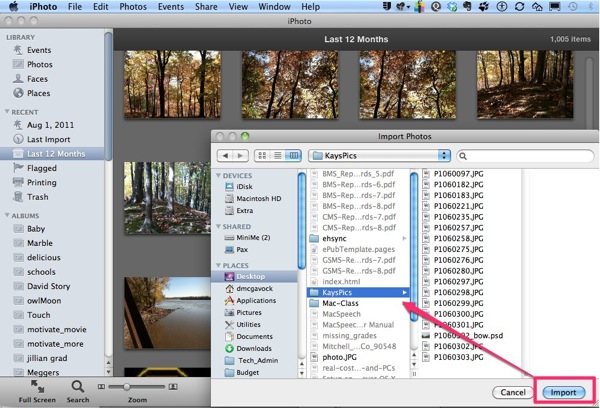
Select the Folder where your photos are located and click Import.

Import pics

When you return to the “Last Import” button in iPhoto you will these photos.

This movie will show you how to move photos out of your “Last Import” folder and into an Album.